.png)
This guide assumes that you are logged into the server or workstation that you intend to backup as an administrator.
.png)
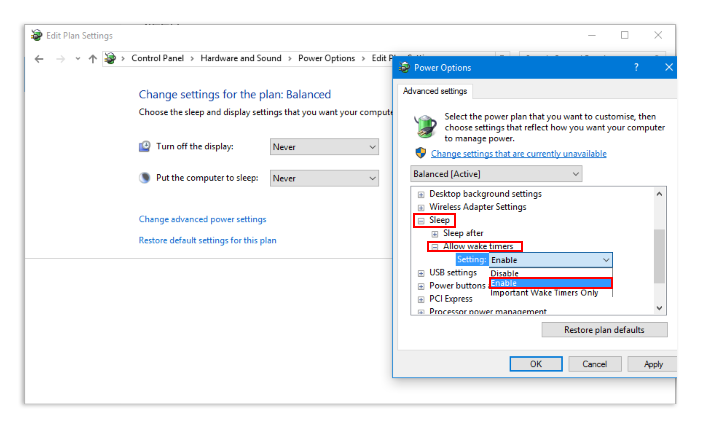
Before you proceed, ensure the computer you will be backing up has wake timers enabled
You can enable wake timers from Control Panel > Hardware and Sound > Power Options > Plan Settings > Change advanced power settings > Sleep > Allow Wake Timers > Enabled
The File and Printer Sharing and Remote Scheduled Tasks Management (RPC) firewall rules must be open on the computer you intend to backup.
 - Remote Desktop Connection Manager v2.7_shadow.png)
! IMPORTANT !
Ensure the above prerequisites are met before proceeding, otherwise remote backup policy configuration and or backups may fail.
Step One: On the server or workstaion you wish to backup, login to the Veeam Availability Console (https://storcloud-vac.syd.nsw.au.imase.io:1280) with the credentials provided via Email.
Step Two: Once logged in, select Managed Computers from the left, then click Download Agent
.png)
Step Three: Once the Agent has been downloaded, run the installer and click Next >
Note: You must be logged in as an Administrator on the computer in which you are installing the Agent.
.png)
Step Four: Review and accept the license terms, then select I accept the terms in the license agreement and click Next >
.png)
Step Five: Click Install
.png)
Step Six: Once the installation is complete, click Finish
.png)
Step Seven: Double-Click on the Veeam Agent tray icon located in the taskbar.
.png)
Step Eight: Fill in the Cloud Gateway, Port, Username and Password fields per the below.
111.png)
Cloud Gateway:
storcloud-vcc.syd.nsw.au.imase.io
Port:
6180
Username:
<your username>
Password:
<your password>
Step Nine: Once you have entered the appropriate information, click Apply
3333.png)
*Note: The Veeam Agent will restart.
Step 10: Once the agent has restarted, double-click the Veeam Agent tray icon.
Confirm that the Agent Status is Connected, then click Close
.png)
Step 11: Return to the Veeam Availability Center and Refresh the page.
11111.png)
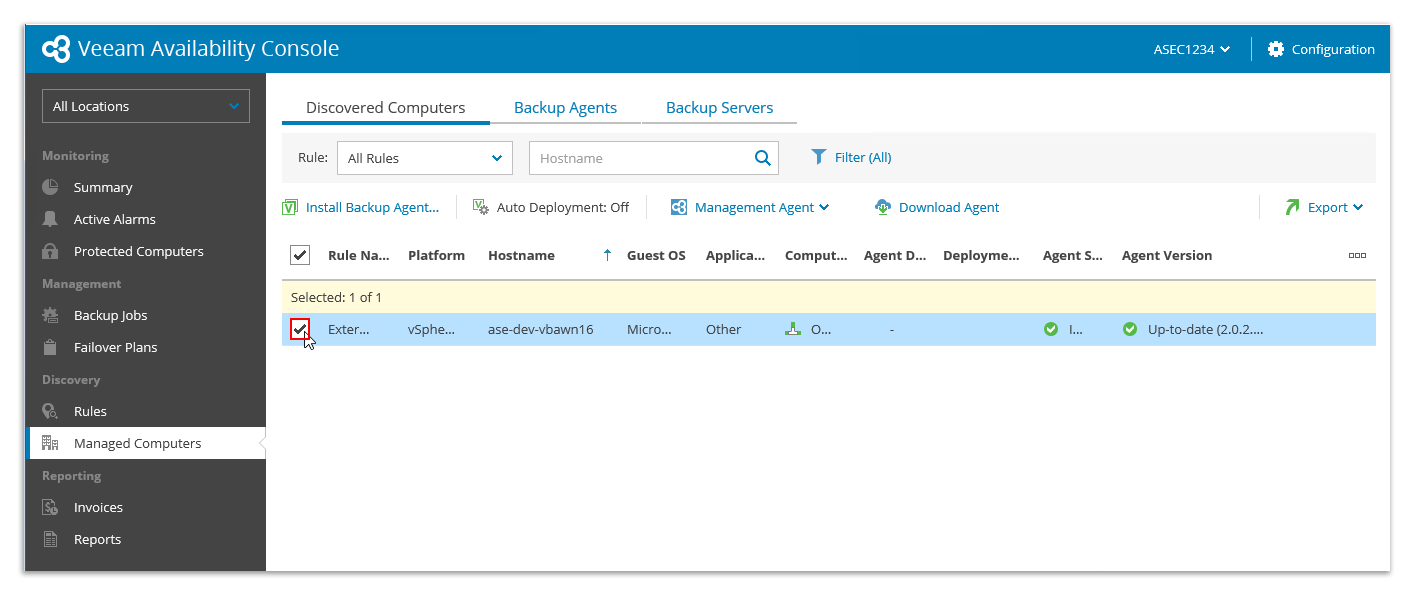
Step 12: The Discovered Computers tab should now be populated. Select the checkbox next to the computer you wish to backup.
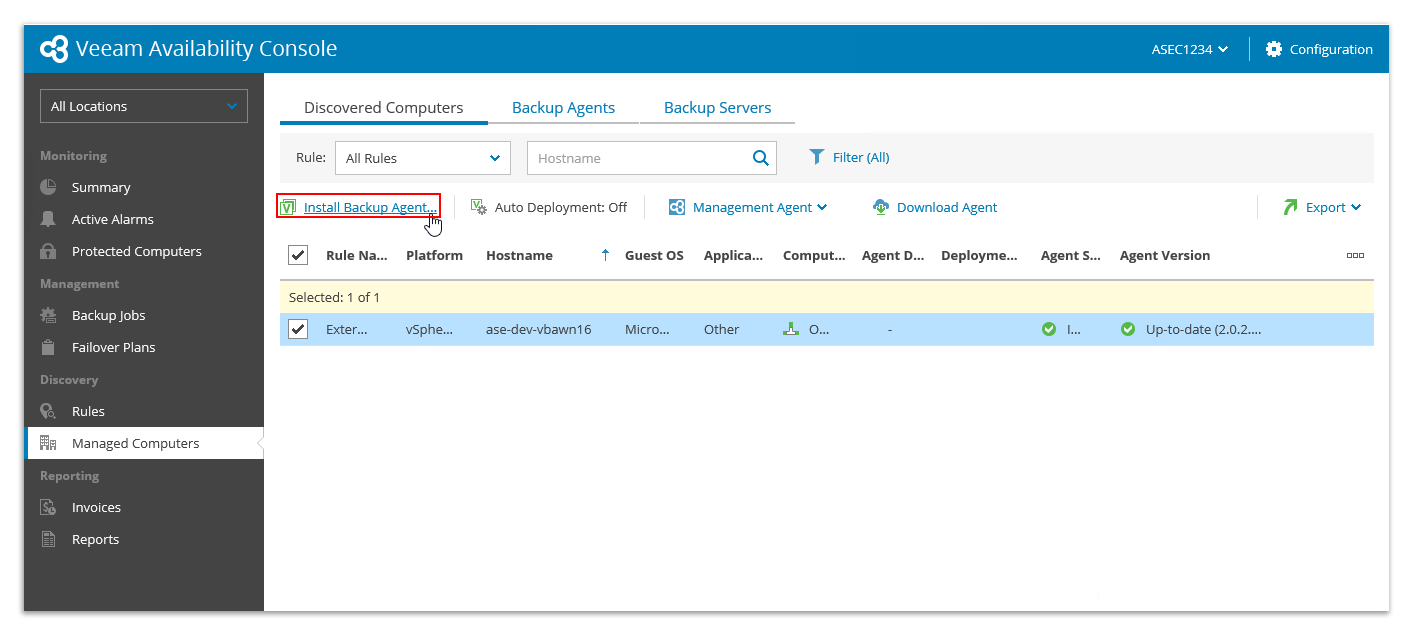
Step 13: With the desired computer selected, click Install Backup Agent...
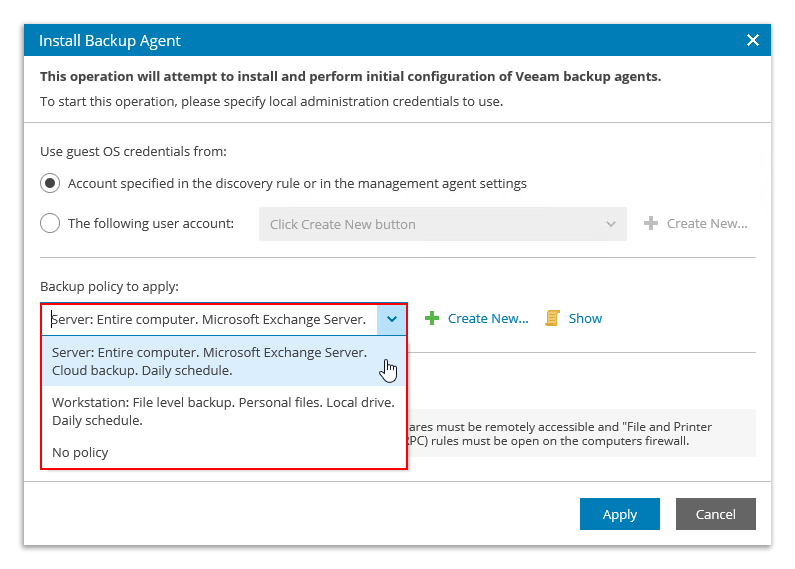
Step 14: Select the backup policy you wish to apply from the drop-down menu.
! IMPORTANT !
To prevent end user changes being made to the backup policy from a Workstation or Server directly, toggle the Enable read only UI access for the backup agent
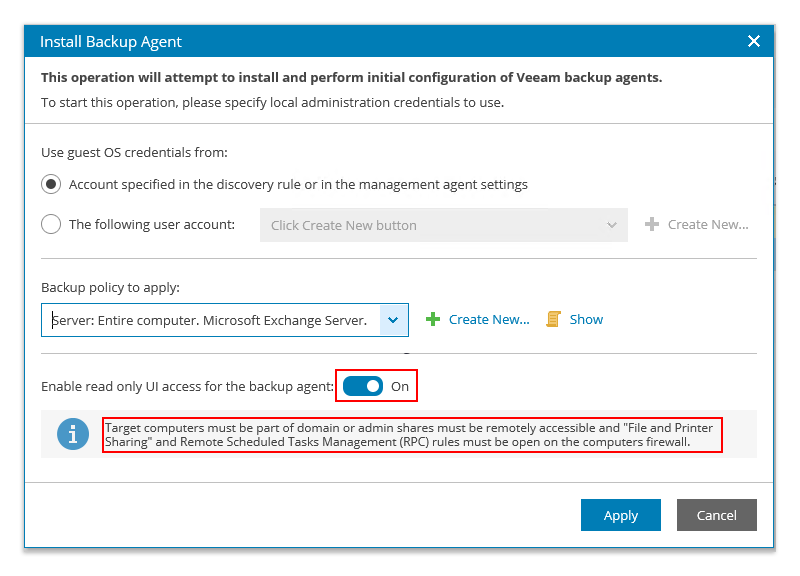
NOTE:
By default, there will be minimum of two backup policies available - one for Servers, and another for Workstations.
If none of the available backup policies in the drop-down suit your requirements, you can also create your own backup policies using the Create New... button.
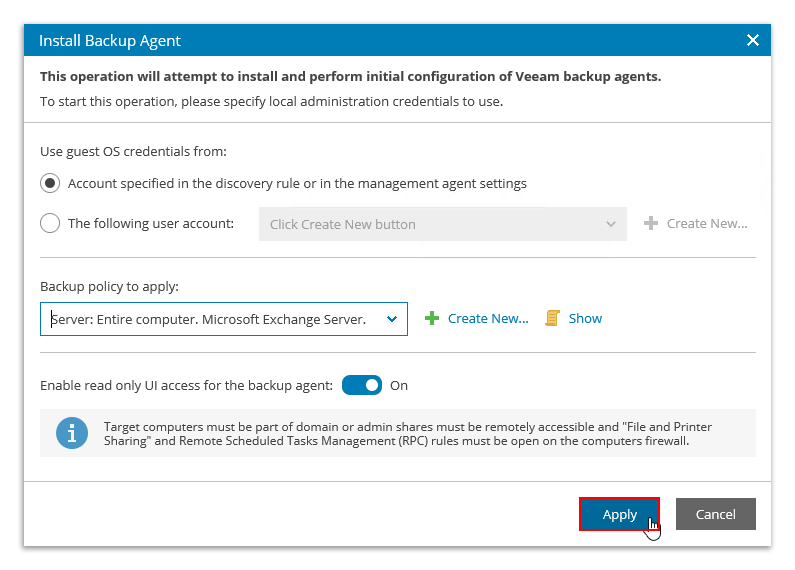
Step 15: Once you have selected a backup policy, click Apply
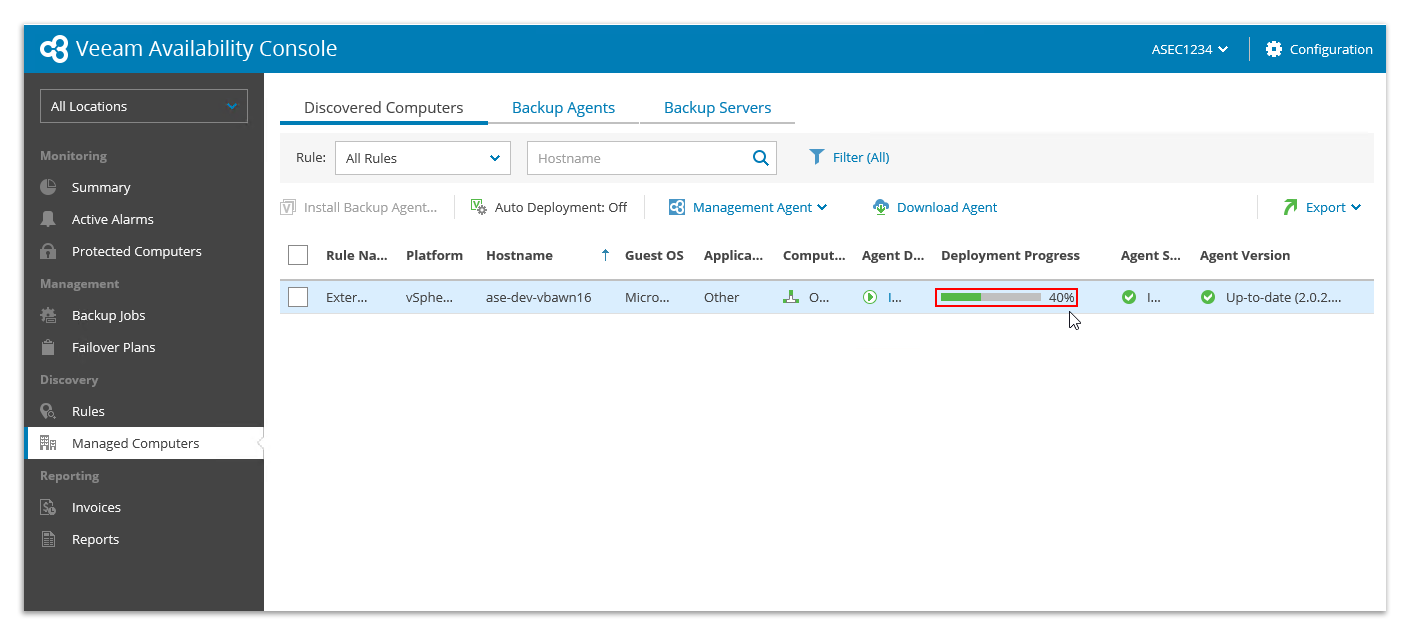
You can monitor the Deployment Progress of the Backup Agent from Managed Computers > Discovered Computers
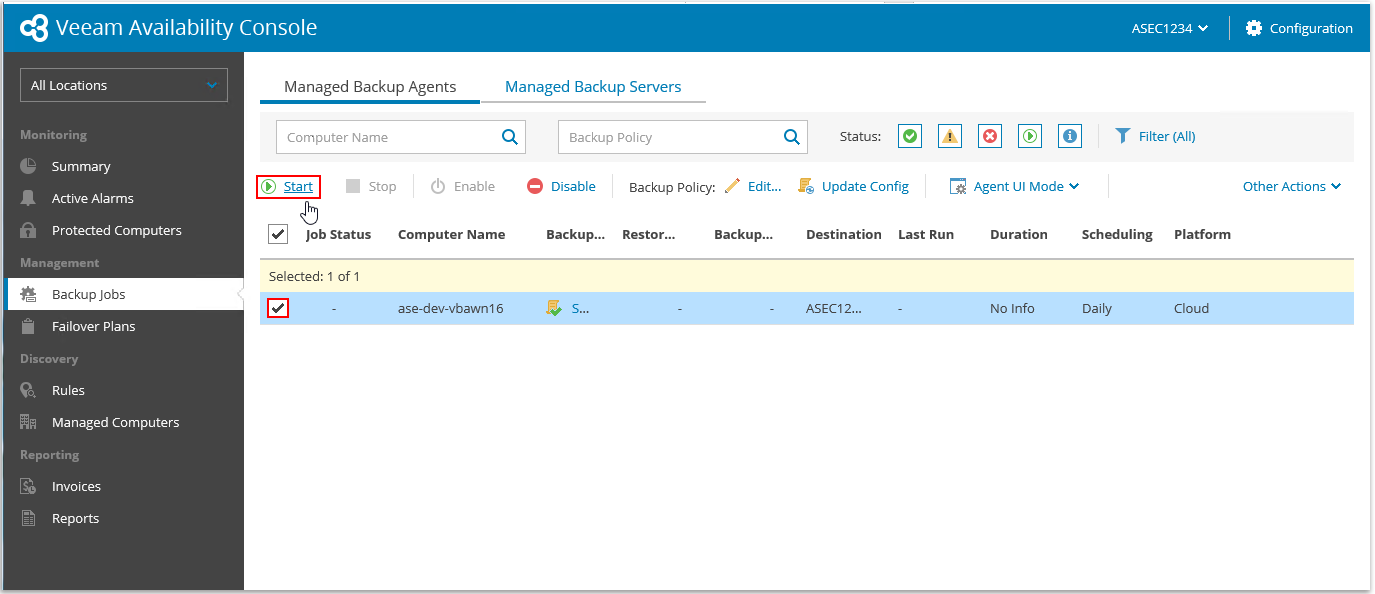
Step One: Select Backup Jobs
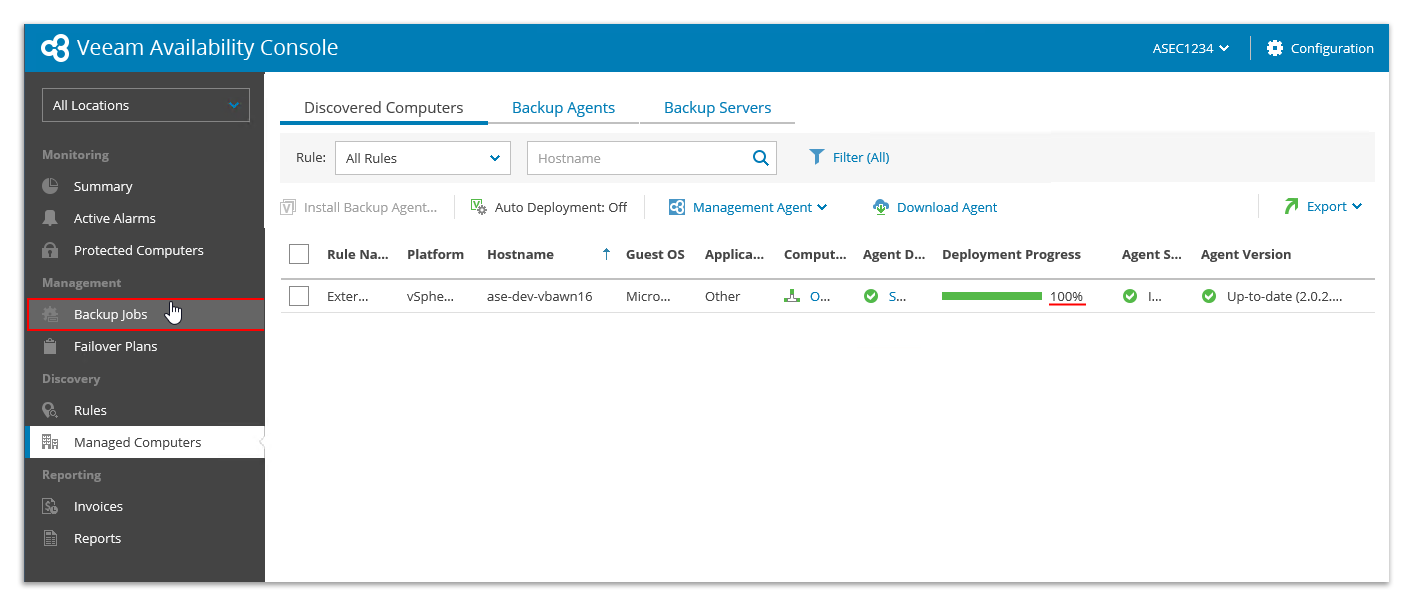
Step Two: Next, select the computer(s) you wish to backup by clicking the checkbox next to them, then click Start
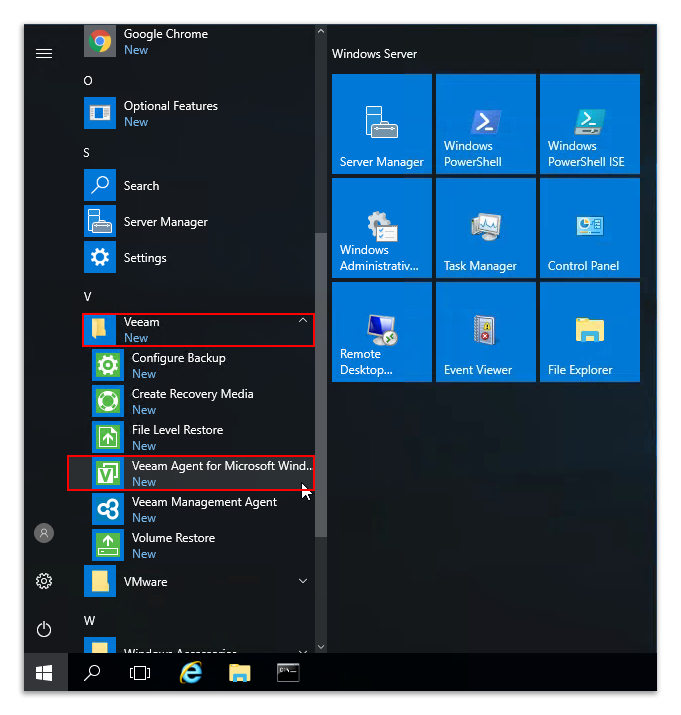
Step One: Click Start
Step Two: Expand Veeam, then select Veeam Agent for Microsoft Windows
The Veeam Agent opens.
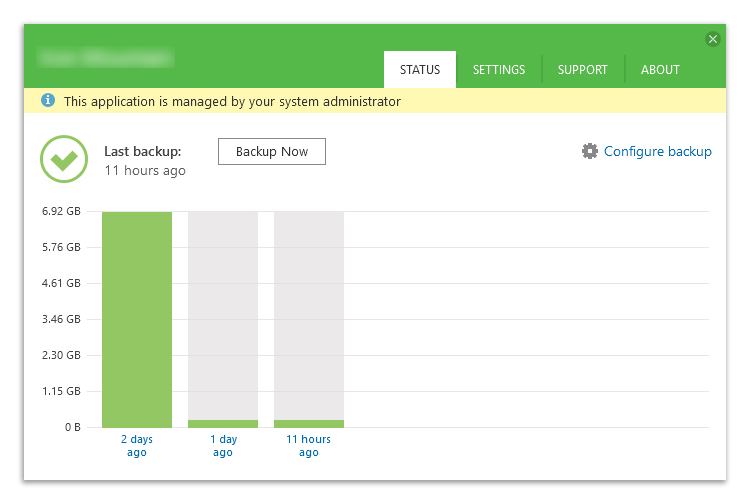
From here, you can check the status of backups and make changes as necessary.